
You'll need:
Wooden embroidery hoops. Like these
Various complimentary fabric remnants
Scissors
Fabric marker or a regular ink pen will do
Sewing machine or needle and thread if you want to add a little oomph to your hoops

Choose your fabric and hoops. I upcycled a couple of old bedsheets I thrifted a couple of weeks ago and happened to have some complimentary remnants in my stash. I purchased hoops from Joann's, but I think I paid too much. The hoops I got are the 18"x 28" oval (paid 5.99) and 2 14" circles (paid 3.99). Still pretty cheap for their purpose. But I'm sure you can find some cheaper if you search around online or hit up some yard sales or your granny's stash.

Spread your first piece on a flat surface, wrong side up, and place your embroidery hoop over it.

Use your fabric marker or ink pen to trace around the outside of your hoop. Give yourself about a 2-3" allowance. This will come in handy later when you are pulling your fabric tight. Then go ahead and cut out your circle (or oval).

I'm sure you've noticed the little contraption on the top of your hoop. This tightens and loosens the outer hoop to hold your fabric in place. Loosen your outer hoop and take them apart.

Lay your inner hoop on your flat surface and then lay your fabric, right side up, over the hoop.

Next you'll place the outer hoop down, sandwiching your fabric between the 2 hoops. Tighten your contraption just enough to hold your fabric in place. From the back side you'll want to start pulling your extra allowance out to pull the fabric tight. Alternate between tightening the hoop and fabric or you'll end up with your fabric bunched up and bubbling out in places.
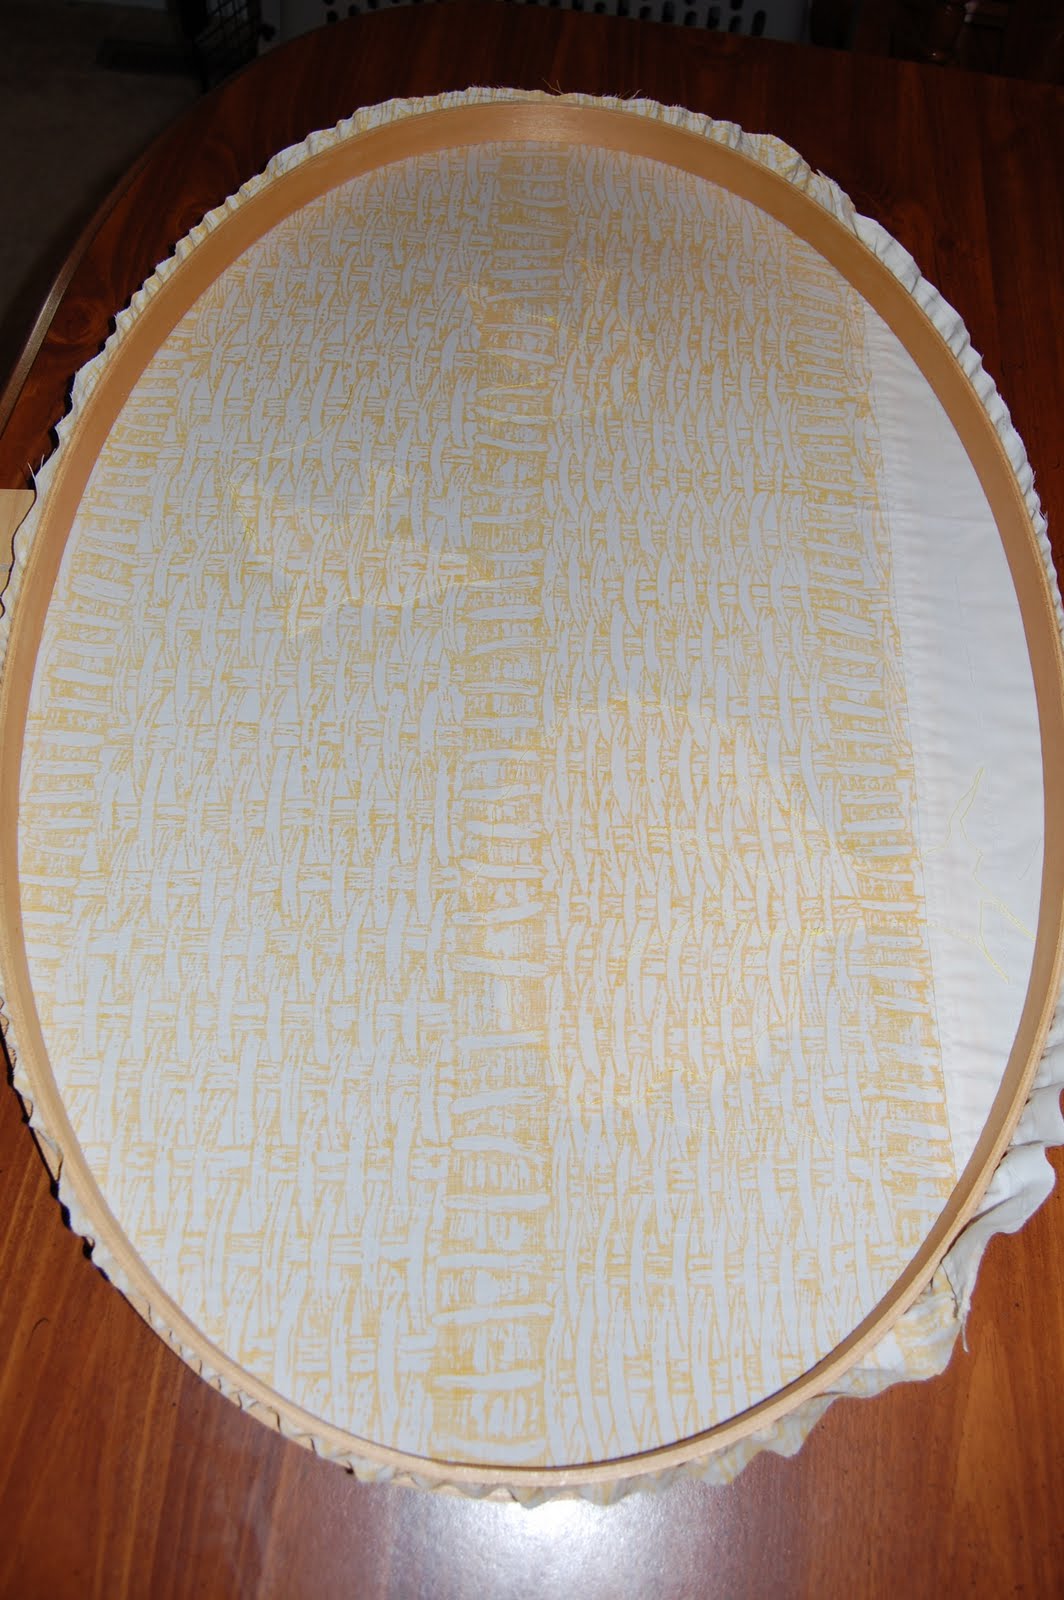

After you've tightened it all the way you'll need to flip your hoop to the back and trim off the excess fabric. Be sure that your hoop is tightened enough to hold your fabric, because after you trim off the excess you won't have anything to grab ahold of to pull it tight.
And that's IT!


I made these as accents.

And hung all three over our bed! Excuse the ugly white walls...
Again, I feel like this was an awful lot of instruction for a pretty easy project, but now it's super clear for you and I got a little practice playing with all of those buttons up there. If you are feeling crazy and want to add a little something, get creative.

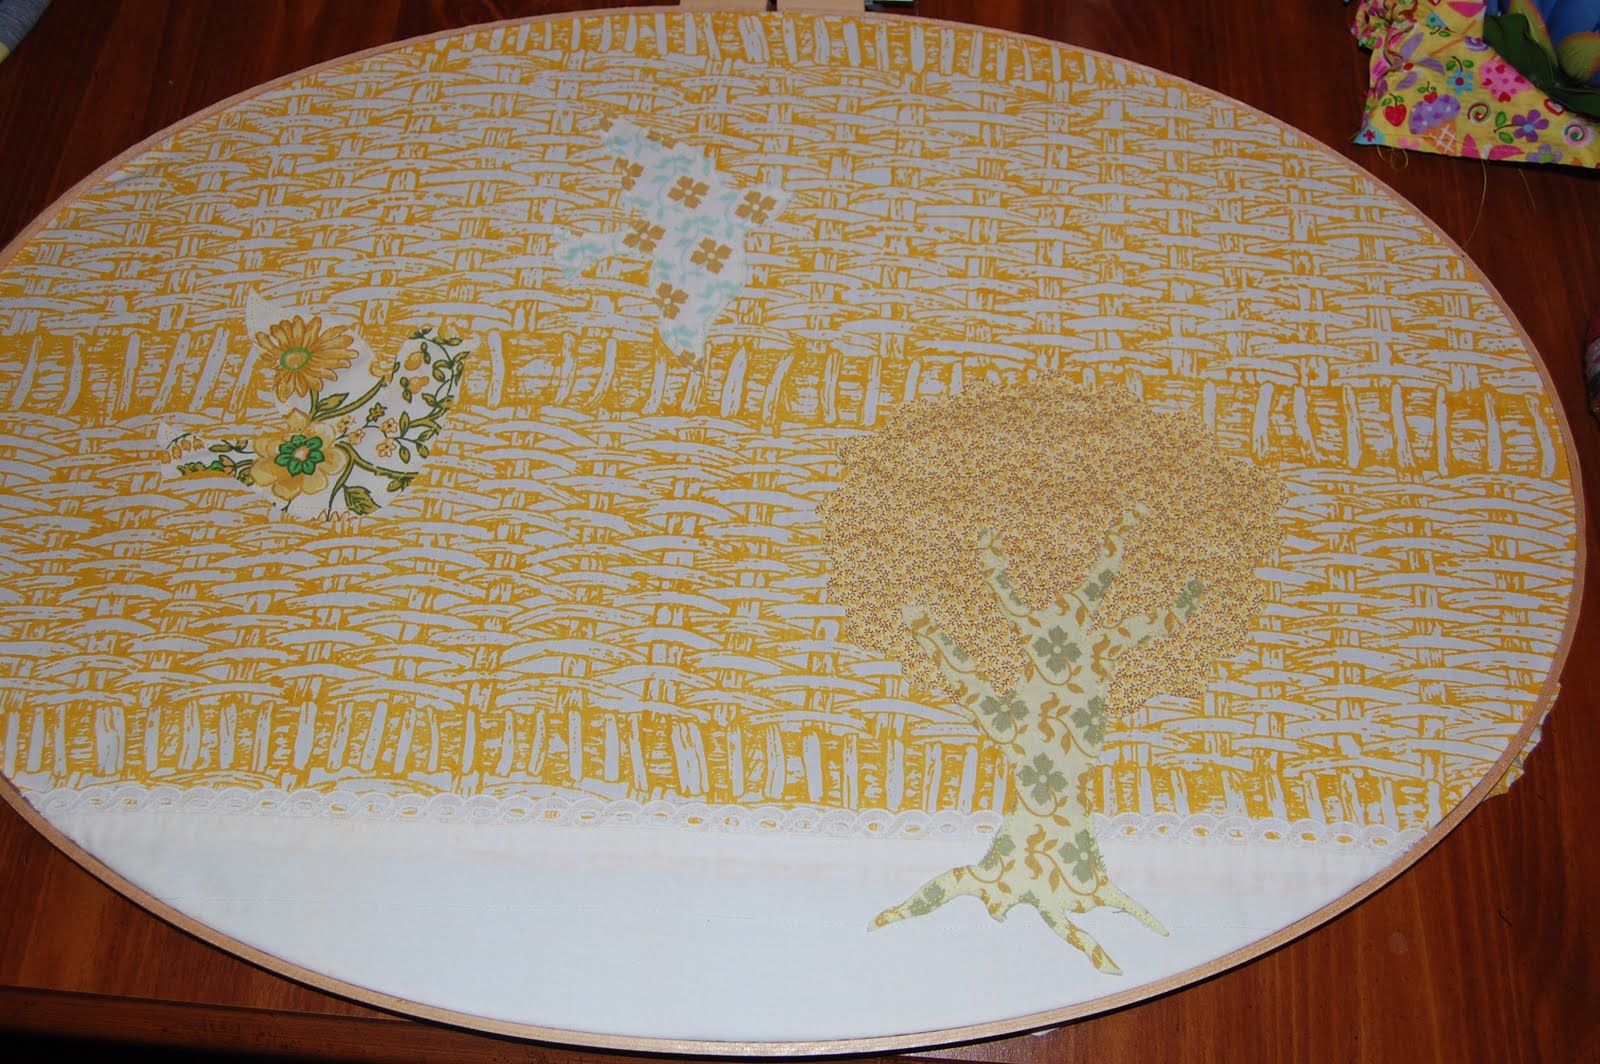
I used this bird template for the birds and free handed the tree. I wish I had made a template for the tree because I'm pretty stoked on how it turned out. You can add ric-rac, ribbon, felt. You will want to sew your pieces on before you put your fabric on the hoop. You can't tell, but I used a super bright yellow thread and sewed about a 1/4" in on all of the pieces. Then I went back and pulled at the edges to fray them out a little. The good thing about this is it's super cheap and easy. If you hate it, take it apart and start fresh. If you change your decor, take it apart and start fresh. No biggie. Be sure to let me know if you try it and post pics!!
Now a photo of my sweet Magnolia actually enjoying tummy time for once today!

No comments:
Post a Comment